How to Build a Wort Chiller
Since I started all grain brewing I’ve always used the ‘no chill’ method of cooling my worth after boiling. This involved simply filling a plastic jerry can with the hot wort and letting it cool overnight before pitching the yeast. However a lax bit of cleaning meant my jerry can was unusable due to black mould (even after a soak in bleach i wasn’t happy using it) so I thought it was time to get an immersion chiller.
What is an immersion wort chiller/
An immersion wort chiller is essentially just a copper coil that you put into your wort about 15 minutes before the end of the boil (this is to sanitise it). When the boil is finished you turn the cold tap on and cold water runs through the coil cooling the wort and expelling warm water the other end. It will cool your wort down in around 30 minutes, though that depends on the cold water temperature.
You can buy pre made wort chillers at most homebrew websites, on ebay or occasionally on Amazon. They generally go for anything from £30 upwards depending on the size. Rather than buy a pre made one, and buoyed by my fermantion fridge build, I thought I’d have a go at making an immersion wort chiller.
How to build an immersion wort chiller
It’s not as hard to make a wort chiller as you would imagine, I had visions of having to buy all sorts of plumbing equipment until I stumbled on this great Youtube video that had a very easy method. Rather than using pipe benders this video uses an old pain tin to wrap the coil of copper around, such a great idea!
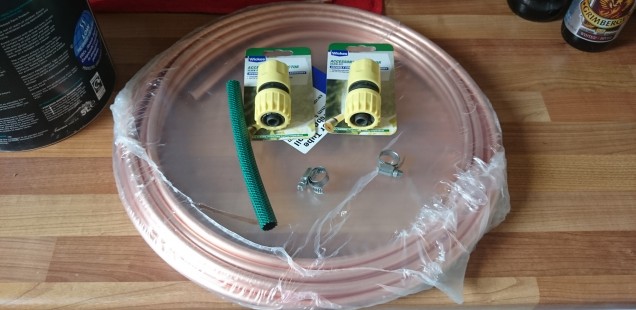
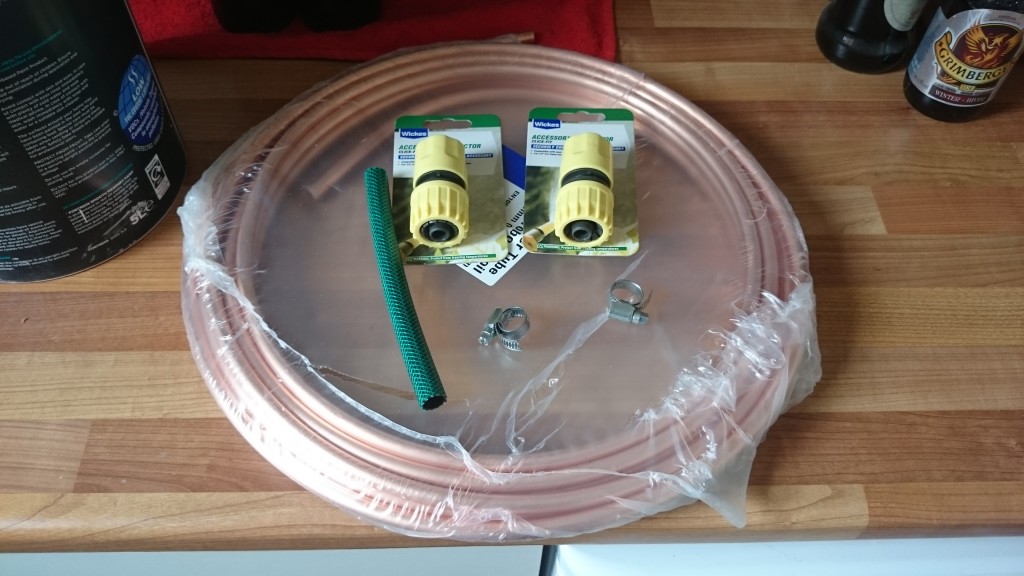
What you need to make a wort chiller
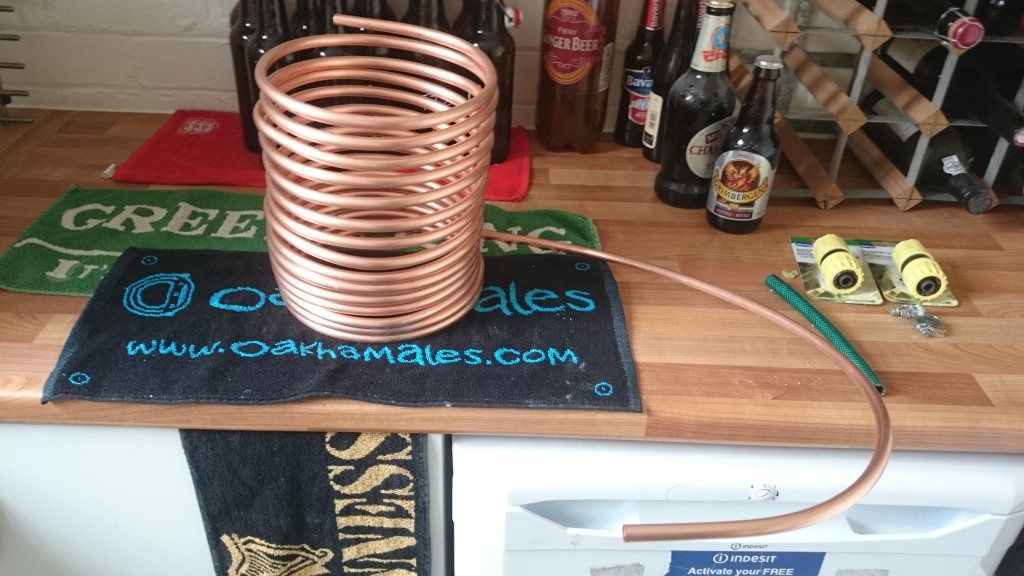
10m coil of 10mm copper tube – Around £20 from Amazon, a little more at your local DIY store
2 Jubilee clips – I got a pack of 10 9mm-16mm ones for £3.69
Some hosepipe – I cut some off an old hose I had in the garden, but you can pick it up cheaply on ebay
Hose fixings – This will depend what you need to fix to your taps/hose
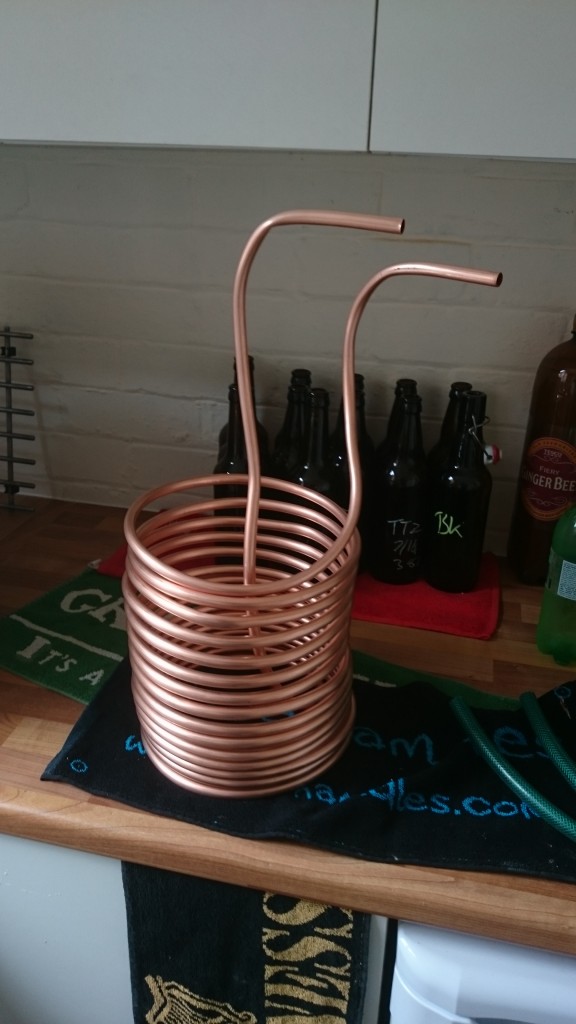
To make the coil for your wort chiller get an old paint tin and start to wind the copper coil around it.
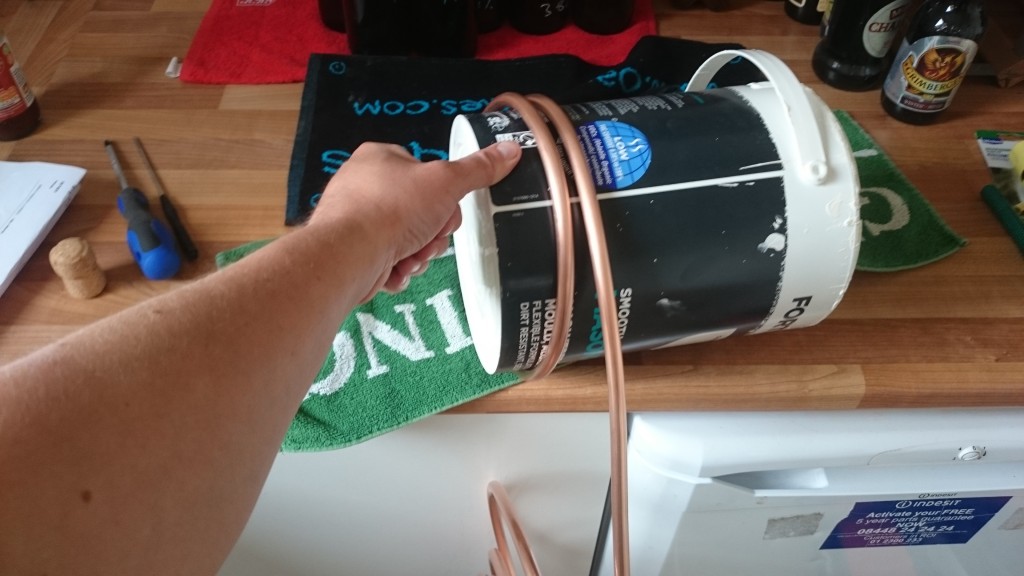
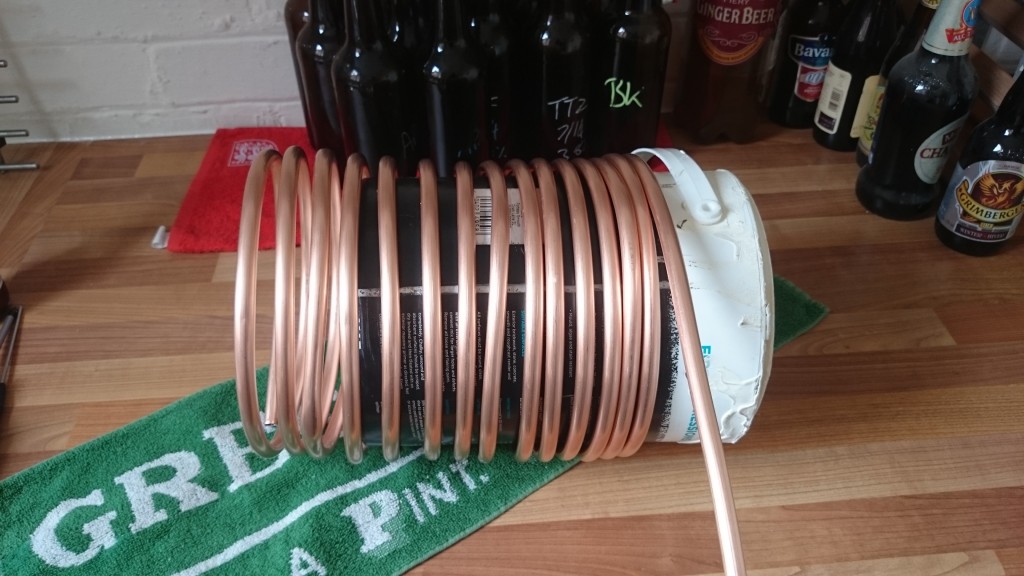
Keep winding until you have around 60cm of copper left
Pass the leftover copper through the centre of your coil and out the top, then carefully bend over the top as shown below. Also carefully bend up the top part of your coil bend over as shown, these form you inlet and outlet. I kinked the top bend a little but it hasn’t affected the performance.
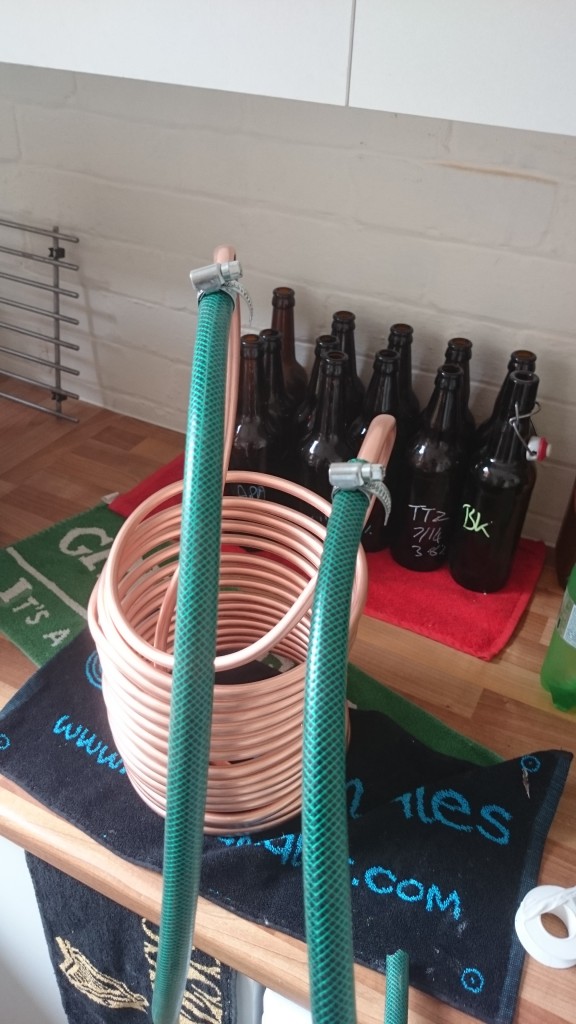
You’re now ready to attach your hoses. I wound a bit of PTFE tape around the end of each copper outlet to help make a tight seal. Then slide the hose pipe onto each one and secure with a jubilee clip, make sure they’re tight but don’t crush the copper.
Testing the chiller
You’re then ready to test your shiny new immersion chiller to make sure there’s no leaks. If water comes out of the join between the hose and the copper tighten the jubilee clip further or try adding more PTFE tape. Making sure the jubilee clip is secure on top of the PTFE tape helps.
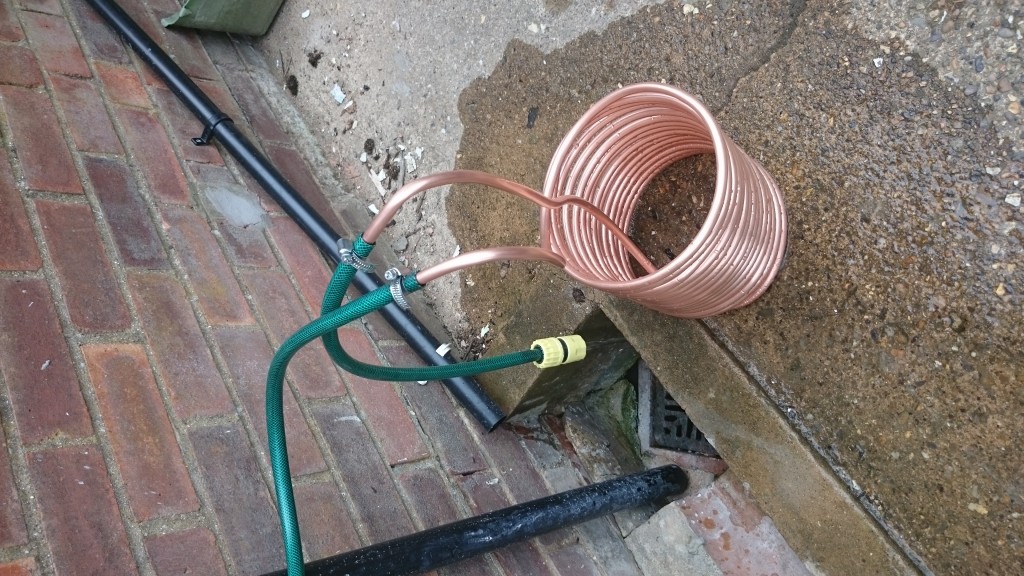
Once you’ve tested you’re ready to chill your next brew! I found it much easier than I was expecting to make my immersion wort chiller, I could probably have made the coil a bit neater but it does the job very well. During the summer it chilled a 23 litre brew down to pitching temp in about 30 minutes, this should be less in the winter when the tap water is cooler.

It’s worth saving the first couple of buckets of water that comes out of your wort cooler as this will be pretty warm and perfect for cleaning down afterwards. I also tipped the further buckets of water into my water butt for watering the garden.
Was it worth making an immersion wort chiller?
I’d say yes, I spent under £30 on the bits I needed so certainly saved there, plus of course had the satisfaction of making something myself. It’s improved the clarity of my beer a little and I seem to be getting more flavour/aroma from the flameout hops.


Thank you so much for this post – I followed your instructions this week after trying to cool a 28l batch in the bath (took almost 3 hours and I ran out of icepacks). Made my chiller this week, used it today to brew and in less than half an hour it’s down from 100°C to 28°C. Amazing! Great tutorial.
Hi Matt, great to hear my guide helped someone out, did you manage to make it a bit neater than my attempt?
Probably not – I didn’t have a paint tin so used a small plastic bin (which got narrowerer at the bottom) so ended up with a less-than-uniform coil of piping. Also my kitchen tap is a single outlet with no easy way of attaching an adapter, so I used one of those shower head tap attachments to go over the tap head and clipped that onto the pipe. Looks amateur, but works a treat!
This looks great!
I am just about to make one of these myself. Bit worried about the bending and possible kinking. Any tips would be most grateful.
Thanks
Hi Bob,
I think just take it nice and slowly. I kinked mine a little for the top ones but it didn’t make a difference. Aldi/Lidl seem to have pipe benders in their special buy things quite often so if really worried could try getting one of them (no idea if they’re any good though). Good luck with your build!
Thanks very much.
You are right.. it’s easy just need to take time.
The shape I have made is unique lol!